2.6 Fund Withdrawal Process
Important: You must aggregate funds before withdrawing. Process: Aggregate → Withdraw.
Fund States
Two balance types:
- Available to Aggregate: Funds in payment addresses needing aggregation
- Available to Withdraw: Funds already aggregated, ready for withdrawal
Step 1: Check Fund Status
Navigate to Wallet Dashboard
- Go to
/walletor click "Accounts" in main navigation - Select your connected wallet account
- View your deployed contracts
Review Balance Overview
- "Available to Aggregate": Funds in payment addresses needing aggregation
- "Available to Withdraw": Funds already aggregated, ready for withdrawal
- Only withdraw from "Available to Withdraw" balance
Step 2: Aggregate Funds (Required First)
If you have "Available to Aggregate" funds:
Start Aggregation Process
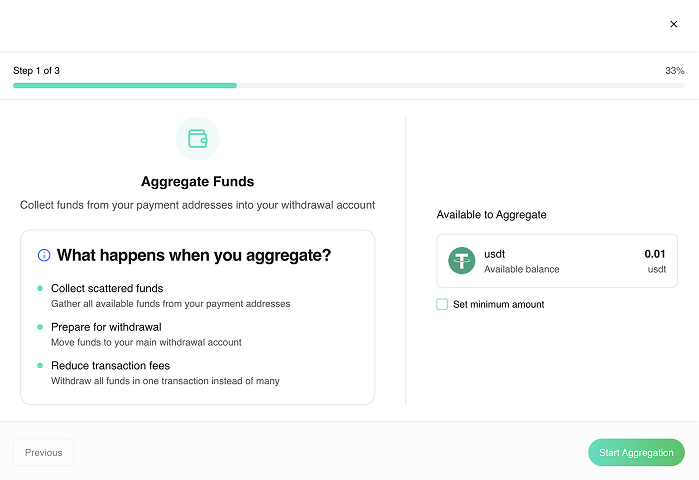
- Click "Available to Aggregate" card
- Aggregation modal opens
Configure Aggregation Settings
- Minimum Aggregate Amounts: Set minimum amounts for each token
- Use Minimum Amounts: Toggle for custom amounts or aggregate all funds
- Review total amount to be aggregated
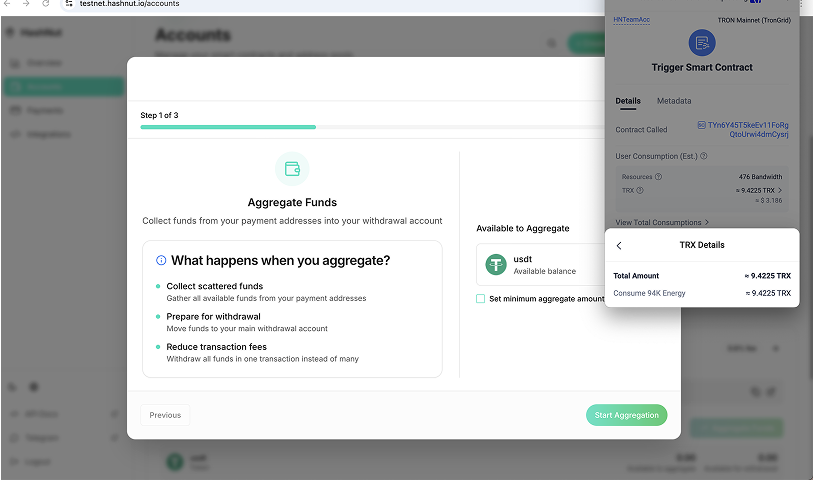
Execute Aggregation
- Click "Aggregate Funds"
- Sign transaction in wallet
- Wait for blockchain confirmation (1-2 minutes)
Verify Aggregation
- Funds move from "Available to Aggregate" to "Available to Withdraw"
- Transaction hash displayed
- Contract balance updated
Step 3: Withdraw Aggregated Funds
Only after aggregation is complete:
Access Withdrawal Interface
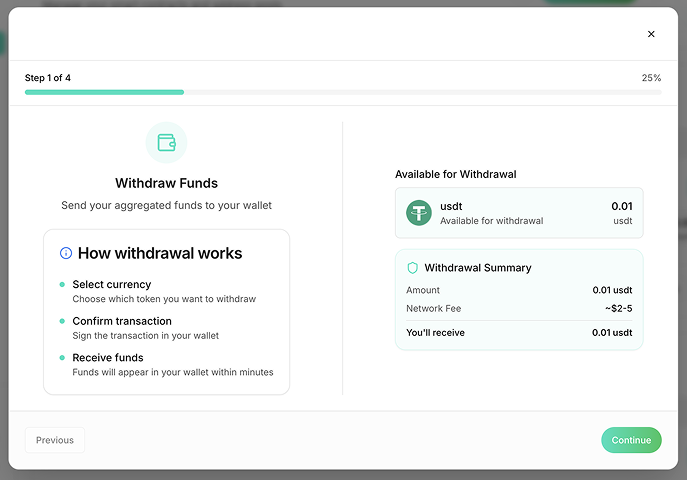
- Click "Available to Withdraw" card
- Withdrawal modal opens showing available tokens
Select Token to Withdraw
Choose from tokens with withdrawable balances:
- USDT (TRC20, ERC20, BEP20)
- USDC (TRC20, ERC20, BEP20)
Verify withdrawable amount is correct.
Review Withdrawal Details

- Token: Verify correct token selected
- Amount: Check withdrawable amount
- Contract Address: Confirm source contract
- Destination: Your connected wallet address
- Network: Verify correct blockchain network
- Fees: Review transaction fees before proceeding
Step 4: Execute Withdrawal
Initiate Withdrawal
- Click "Continue" to proceed
- System prepares withdrawal transaction
Sign Transaction
Your wallet prompts for transaction signing:
EVM chains (ETH, BSC, Polygon):
- MetaMask or compatible wallet opens
- Review transaction details
- Click "Confirm" to sign and send
TRON:
- TronLink prompts for transaction signing
- Review transaction details
- Click "Confirm" to execute
Monitor Progress
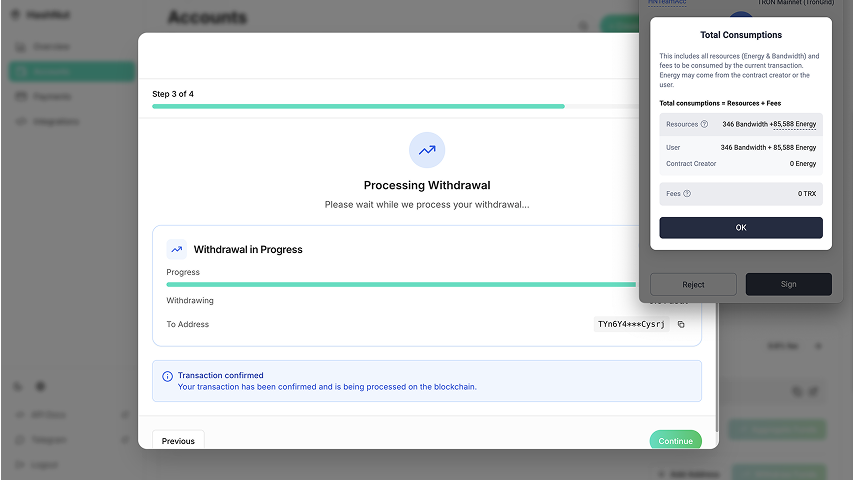
- Watch progress bar during transaction processing
- System shows real-time status updates
- Wait for blockchain confirmation (1-2 minutes)
Step 5: Verify Withdrawal Completion
Transaction Confirmation
- Success message appears once confirmed
- Copy transaction hash for records
- Click "View on Explorer" to verify on blockchain explorer
Check Wallet
- Verify tokens received in wallet
- Check wallet balance to confirm withdrawal
- Contract balance shows reduced withdrawable amount
Complete Fund Flow
- Customer Payments → Funds go to payment addresses (Available to Aggregate)
- Aggregate Funds → Move funds to main contract (Available to Withdraw)
- Withdraw Funds → Move funds from contract to wallet